19MXR
Setup
Firmware & Drivers & Mode
Firmware: No firmware update is available at the time that this document was written, however you should always check at the manufacture website.
Drivers (for Windows only): Install the latest ASIO drivers from http://www.adj.com/19-mxr (Download tab)
No drivers are required for Mac OSX computers.
Operation mode: The American Audio 19MXR can operate in Mixer or Controller mode. By default the Mixer mode is selected. To switch to Controller mode, power off the unit, hold down the CONTROLLER MODE button (32) and then power on the unit. The Led of the Mode button will be on if the unit is on Controller mode.
VirtualDJ 8 Setup
Once VirtualDJ 8 is launched, a Login Window will appear. Login with your virtualdj.com account.
A Pro Infinity or a Pro Subscription License is required to fully use the American Audio 19MXR. Without any of the above Licenses, the controller will operate for 10 minutes each time you restart VirtualDJ.
http://www.virtualdj.com/buy/index.html
The 19MXR is also coming bundled with VirtualDJ LE. In this case download and install the Limited Edition from http://www.virtualdj.com/le


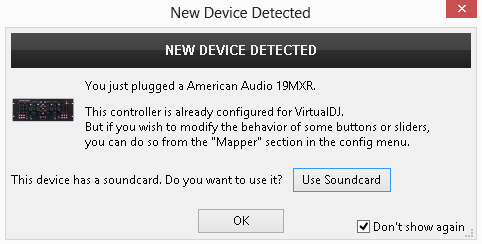
The unit is now ready to operate.
Mixer mode
By default the unit will launch in Mixer mode. The Led of the CONTROLLER MODE button (B) will be off, as an indication. In this mode the unit is able to control 2 software decks (Midilog 2 will control VirtualDJ deck 1 and Midilog 3 will control VirtualDJ deck 2). Midilog 1 and 4 can be only used as Analogue Inputs. Make sure the Midilog 2 and 3 USB/ANALOGUE switchers (16) are on USB position.
AUDIO Setup
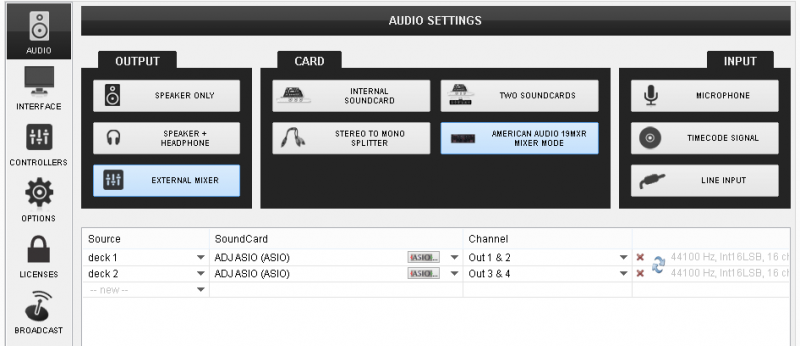
The Audio configuration for the Mixer mode is pre-defined and offered in the Audio tab of Settings as a special button in the CARD tab. Press this button and then click on APPLY to auto-create the following audio configuration.

Note that in this mode, the audio routing is handled by the unit and even though most of the mixer faders and knobs will be visible on VirtualDJ GUI when used, the EQ, the Filter and the mixer functions are hardware operations (VirtualDJ internal mixer is not used)
MIDI Operation
The unit should be visible in the CONTROLLERS tab of Config and 2 different factory default mapping options will be available in the Mappings drop-down list. Make sure the factory default Mixer Mode mapping is selected. The factory default Mapping offers the functions described in this Manual, however those can be adjusted to your needs via VDJ Script actions.

Controller mode
If the unit is on the Controller mode, the Led of the CONTROLLER MODE button (B) will be on, as an indication. In this mode the unit is able to control up to 4 software decks. Midilogs 1, 2, 3 and 4 will control VirtualDJ decks 3, 1, 2 and 4 respectively. Each one of the Midilogs can be used as an analogue source input as well (using the USB/ANALOGUE switcher (16)), however the sound of the corresponding VirtualDJ deck will be muted if the ANALOGUE position is selected.
AUDIO Setup
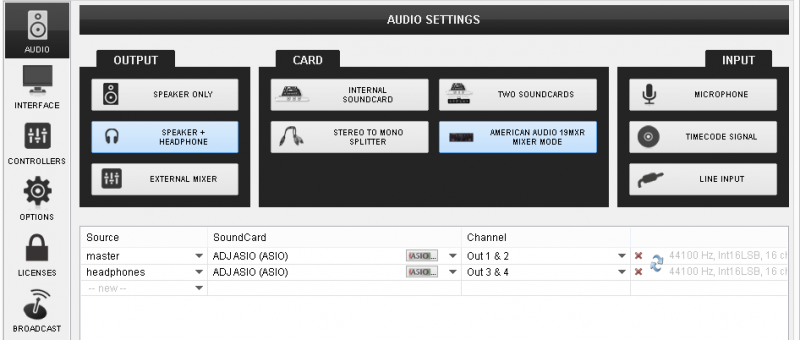
The Audio configuration for the Controller mode is not pre-defined and needs to be manually configured as per the following image and click to APPLY when done.

MIDI Operation
The unit should be visible in the CONTROLLERS tab of Config and 2 different factory default mapping options will be available in the Mappings drop-down list. Make sure the factory default Controller Mode mapping is selected. The factory default Mapping offers the functions described in this Manual, however those can be adjusted to your needs via VDJ Script actions.

For further software settings please refer to the User Guide of VirtualDJ 8.
http://www.virtualdj.com/manuals/virtualdj/index.html


