


PMX10
Setup Avanzato
MIDI MAPPING
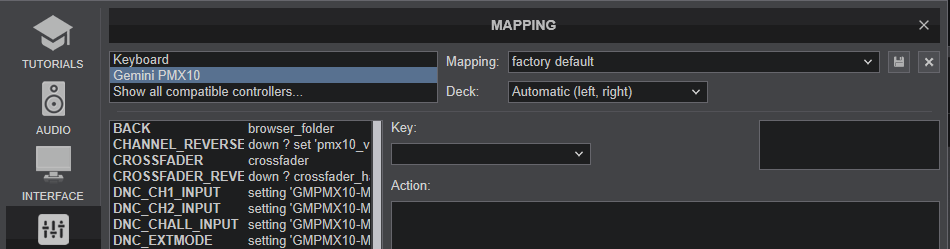
The unit should be visible in the CONTROLLERS tab of Config and the “factory default” available/selected from the Mappings drop-down list. The factory default Mapping offers the functions described in this Manual, however those can be adjusted to your needs via VDJ Script actions.
Read further details at
http://www.virtualdj.com/manuals/virtualdj/settings/controllers.html
http://www.virtualdj.com/wiki/VDJ8script.html
AUDIO Setup
Default Audio setup
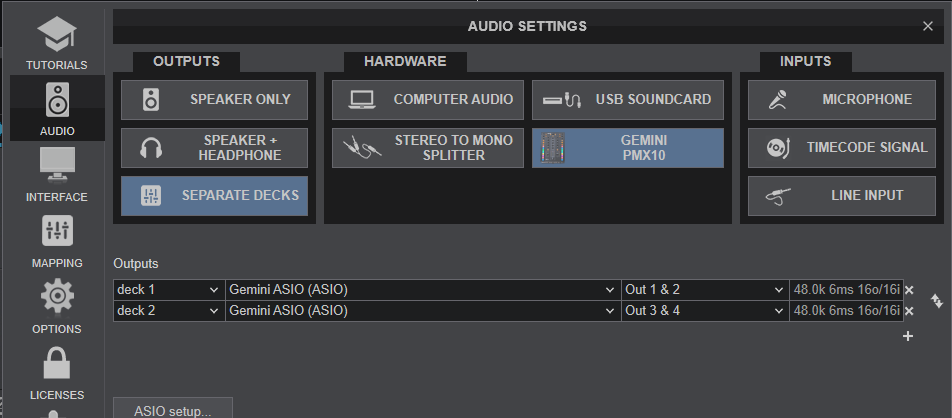
The unit has a pre-defined Audio setup and a special button in the AUDIO tab of Config to provide that.
If the pre-defined audio setup is selected, speakers and Headphones need to be connected to the unit at the rear and front side panels respectively.

MIXER MODES
The Gemini PMX10 can operate in 2 modes, the MIXER (Hardware) mode and the MIDI (Software) mode.
HARDWARE MIXER MODE
This mode is the default and auto-selected on every power-cycle. In this mode, the audio mixing (Volume, Equalizer, Filter and Crossfader) is performed by the PMX10. All the previously mentioned mixer elements, will still send Midi signal, thus the corresponding elements on the GUI of VirtualDJ will follow the movements and positions of the hardware ones. However, the GUI elements will not control the mixing (fake mixer mode).
SOFTWARE MIDI MODE
In this mode, the audio mixing (Volume, Equalizer, Filter etc) is performed by VirtualDJ and a different sound card (other than the builtin of the PMX10) can be used as well. The USB Audio interface of the PMX10 does not offer Timecode/DVS Inputs in Midi mode.
How to switch between the 2 modes
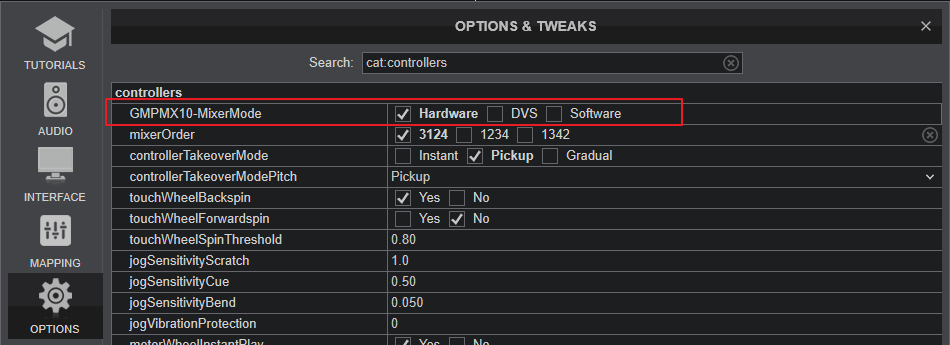
Open VirtualDJ Settings ->OPTIONS tab->CONTROLLERS subcategory and select the Gemini PMX Mixer Mode from the MixerMode setting.
Select Software for MIDI Mixer Mode, or Hardware (or DVS) for Hardware Mixer mode
Select the DVS (Hardware) Mixer mode if you plan to use Timecode (DVS).
Each time a mode selection is performed, VirtualDJ will ask you to apply the necessary Audio setup for the selected mode.
Notes
The special GEMINI PMX10 button in the Audio Setup tab of VirtualDJ Settings is always offering the audio configuration of the default - Hardware/Mixer mode.
TIMECODE (DVS) CONTROL
The Gemini PMX10 is offering a built-in USB audio device with 2 stereo inputs, suitable for Timecode (DVS) controls.
- Connect your Timecode devices (Turntables with Timecode vinyl) or CD Player (with Timecode CD) to the rear panel Input CH1/CH2 sockets.
- Depending on the type of your Timecode source, set the LN/PH switches accordingly.
- Go to VirtualDJ Settings->AUDIO tab and click on the TIMECODE SIGNAL button to auto-generate the following audio setup.
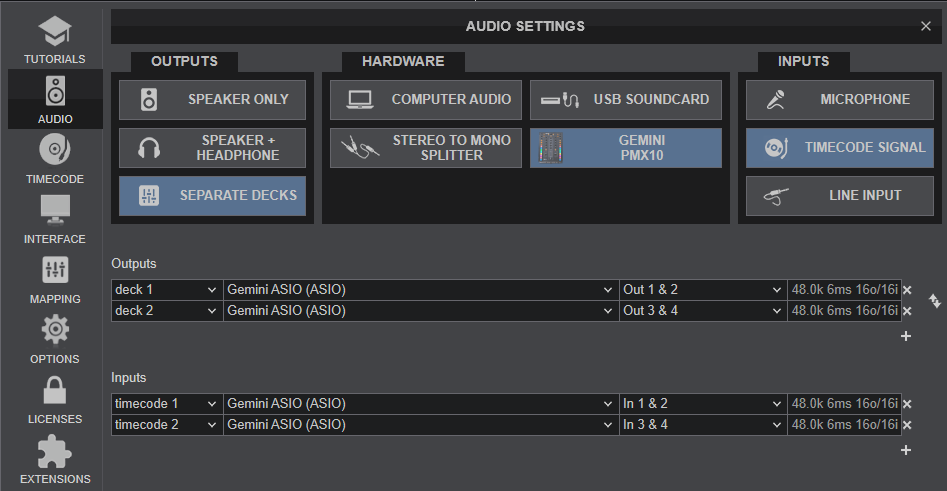
- Click to APPLY and close the Settings window
- Start playing your Timecode sources
- Make sure your Timecode signal is strong and the Timecode buttons on the VirtualDJ GUI are enabled.
Note
Timecode (DVS) control requires a VirtualDJ Pro License or a Limited Edition keycode (serial) of Gemini PMX10 (comes with a special Timecode additional license - which requires online login for the extra license to be validated, at least once).
RECORDING
When mixing with VirtualDJ, your mix can be recorded in the following cases.
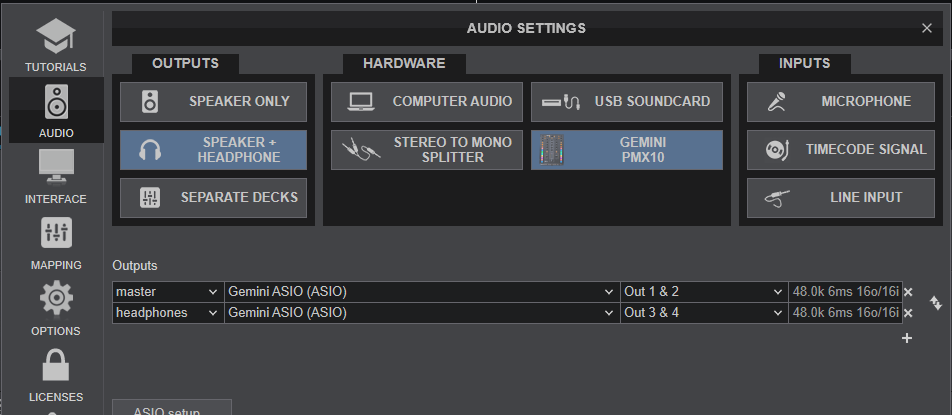
- The PMX10 is set to Software/MIDI mode. In this case (with Master & Headphones as Audio setup), all you need to do is to use the REC button in the MASTER Mixer panel of VirtualDJ GUI to record your mix. However, the Microphone input of the PMX10 will not be recorded
- The PMX10 is set to Hardware(MIXER) mode. In this case, you will need to route the Master Output from either the BOOTH or REC Output to an Input of another USB Audio Interface and add a record line in your Audio setup.
In the following example, we have connected the REC Output with the Input of a USB Audio Interface using standard 2xRCA to 1/8" stereo jack, and we have added a record line using the input of that sound card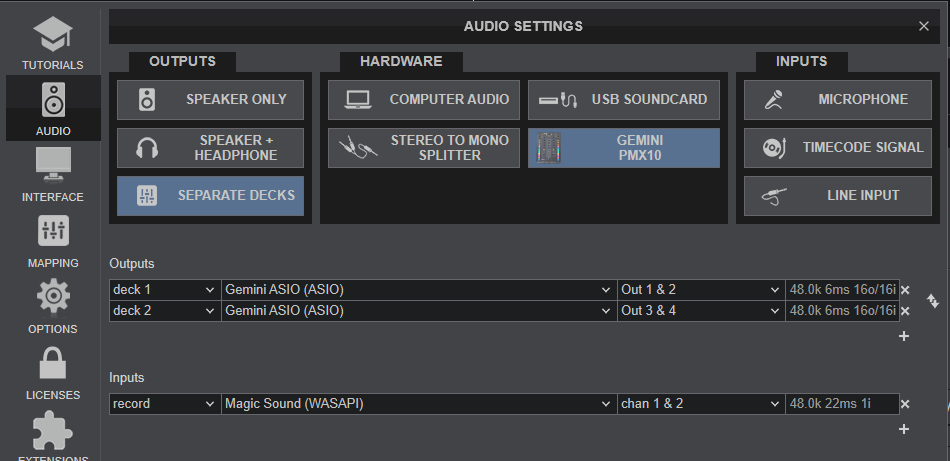
Hardware mode - Audio setup with external Recording Input
Note that in case of recording externally (using the REC OUT routed to a different sound card), all inputs (from CH1/CH2 sources) and the Microphone of the PMX10 will be also recorded along with your mix
For further software settings please refer to the User Guide of VirtualDJ 8. http://www.virtualdj.com/manuals/virtualdj/index.html
