


Quattro
Setup Audio Avanzato
Mixars Quattro offers a variety of different Audio Setups and Operation modes. The possible configurations are described here.
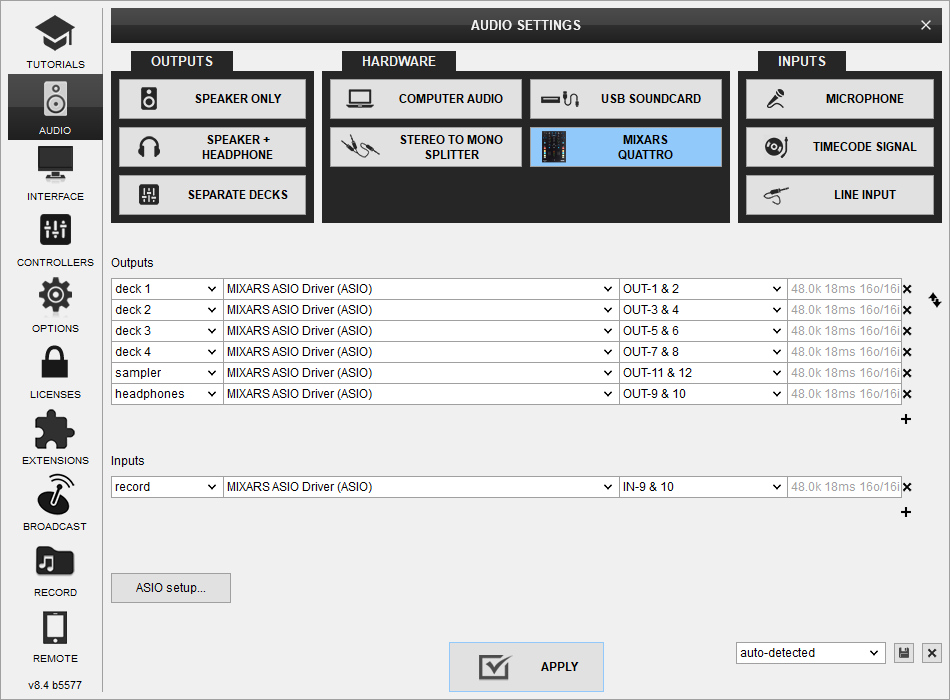
Recording & Broadcasting
The unit offers a dedicated Input to record your Main Mix. VirtualDJ has pre-configured this input for recording, thus no special setting is required in order to record your mix (including analogue sources and Microphone).
Use the REC or BSCAST buttons from the MASTER center panel of the VirtualDJ GUI to Record or Broadcast your mix.
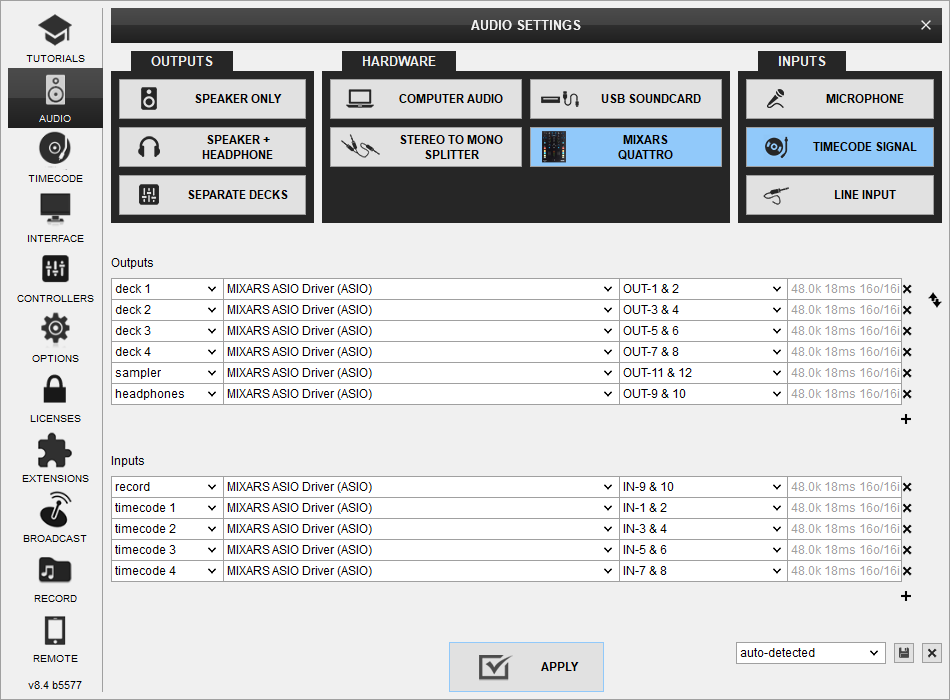
Timecodes (DVS)
Mixars Quattro offers DVS (Timecoded CDs and Vinyls) Support.
Depending on whether you use Timecode Vinyl (Turntables) or Timecode CDs (CD Players) please perform the following steps:
- Connect your Turntables or CD Players on the inputs marked as "Phono" on the back of the unit
- Set the Phono/Line switcher in each input to the appropriate position depending on whether you connected a turntable or cd-player on the step above.
- Place the Input switches on the top panel to USB (A or B) position
- Open VirtualDJ Settings ->AUDIO tab ans press the TIMECODE SIGNAL button from the INPUT tab
- Click to APPLY

If you wish to rather connect your turntables on channels 3 & 4 use the following configuration instead:

Also you can use up to 4 turntables to control all 4 decks via DVS:
Use the TIMECODE On/Off buttons that will be offered on the Decks (or in the SCRATCH panel for the 4 Decks default VirtualDJ GUI) to enable/disable Timecode control.
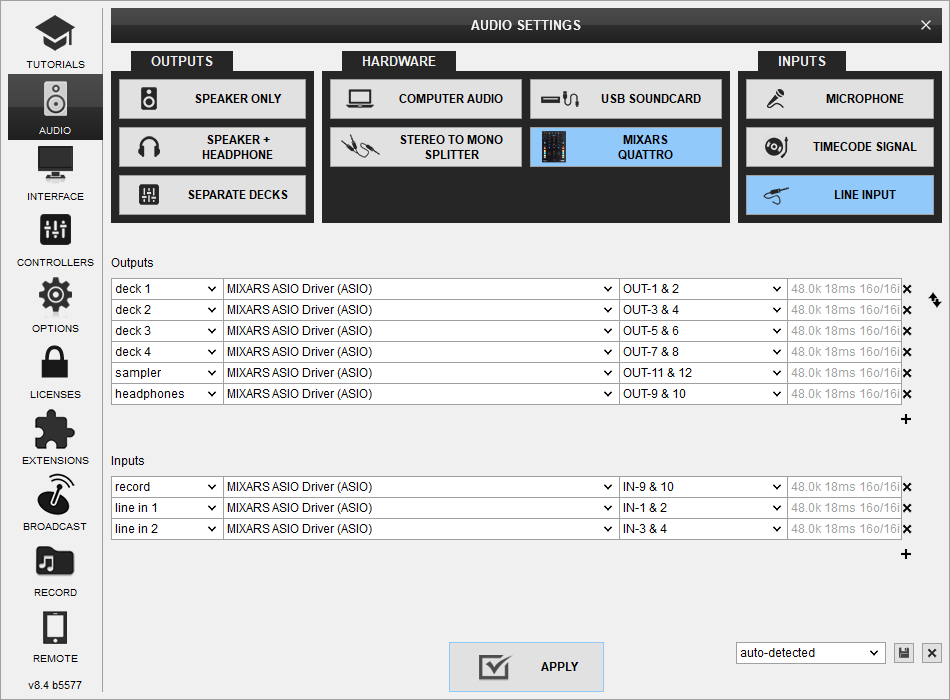
LINE INS
The LINE Inputs can be also used to send audio signal from an analogue media source connected at the rear panel to VirtualDJ for processing.
- Connect your analogue media devices to one of the available inputs marked as "Phono" on the back of the unit.
- Switch the Line/Phono switcher to Line position for that channel(s)
- Place the Input switches on the top panel to USB position
- Open VirtualDJ Settings ->AUDIO tab and press the LINE INPUT button from the INPUT tab
- Click to APPLY


Use the LINE IN On/Off buttons that will be offered on the Decks (or in the SCRATCH panel for the 4 Decks default VirtualDJ GUI) to enable/disable Line In routing to a VirtualDJ deck.
This will provide the ability to synchronize BPM with other decks, use Effects etc.
Mixed Modes
While VirtualDJ can bypass it's timecode engine and use the source of timecode signal as line input, it is also possible to have mixed audio configurations with both Timecode (DVS) and Line-Inputs if special use cases require it.
- Connect your analogue media devices to one of the available inputs marked as "Phono" on the back of the unit.
- Switch the Line/Phono switcher to Line position for that channel(s)
- Place the Input switches on the top panel to USB position
- Open VirtualDJ Settings ->AUDIO tab and press the TIMECODE SIGNAL button from the INPUT tab
- Press the LINE INPUT button from the INPUT tab
- Click to APPLY

MICROPHONE INPUTS
Mixars Quattro offers 2 Microphone Inputs and Level/EQ controls from the top panel. Both audio signals from these inputs are directly routed to the Master Output of the unit.
The Microphone inputs are not part of the USB Audio interface, so these cannot be added in VirtualDJ Audio setup and will not control the software Microphone section in the MASTER panel of VirtualDJ GUI and vice versa.
However, as mentioned in the Recording section, both Microphone Inputs can be recorded via the REC button of VirtualDJ via the dedicated recording input channel of the Audio interface.
