


DJM-S7
Setup
Connections
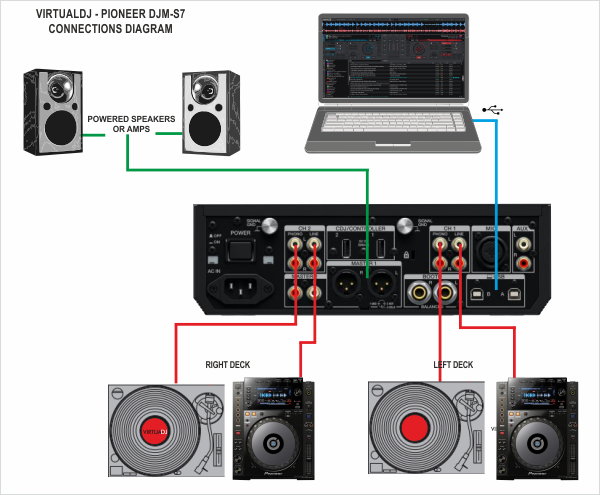
- Connect your computer to USB port A or B at the rear panel of Pioneer DJM-S7
- Optionally, connect each of your deck’s RCA cables to ANALOG INPUTs CH1/CH2 respectively, depending on which software deck you wish to control.
Choose the LINE or PHONO Inputs depending on your device (CD player, turntable. Secure the ground wire to a Phono Ground terminal). - Set the SOURCE selector at the top panel for DECKs to the USB position A or B depending on the port you have used to connect with your computer.
- Connect the Pioneer DJM-S7 with AC power using the provided cable and power on the unit
Note: Usage of turntables or CD players (for DVS) is not necessary. The mixer may be used as a pure MIDI mixer. VirtualDJ is also offering the ability to control all the software decks with even with a single timecode unit. See Timecode (DVS).
Drivers
For Windows computers :
Install the latest ASIO driver from https://www.pioneerdj.com/en/product/mixer/djm-s7/black/support/
For Mac computers :
You don't have to install the driver software. Mac OS standard audio driver will be automatically installed when you DJM is connected to your Mac with a USB cable.
However, it is recommended to install the Mac Driver that allows you to change the settings of the DJM from https://www.pioneerdj.com/en/product/mixer/djm-s7/black/support/
There is no firmware update available at the time this manual is written, but is it advised to check at Pioneer DJM-S7 page https://www.pioneerdj.com/en/product/mixer/djm-s7/black/support/
VirtualDJ 8 Setup
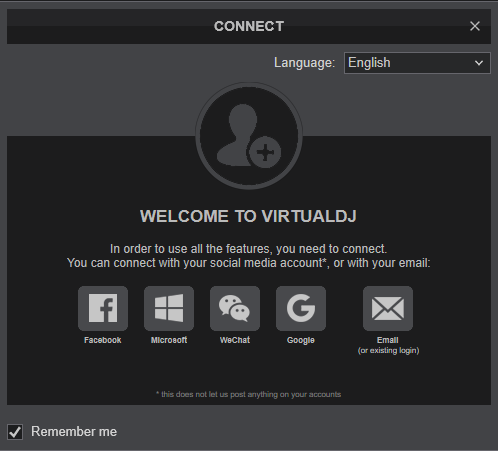
Once VirtualDJ is launched, a Login Window will appear. Login with your virtualdj.com account credentials.
A Pro Infinity or a Pro Subscription License is required to use the Pioneer DJM-S7. Without any of the above Licenses, the mixer will operate for 10 minutes each time you restart VirtualDJ.
https://virtualdj.com/buy/
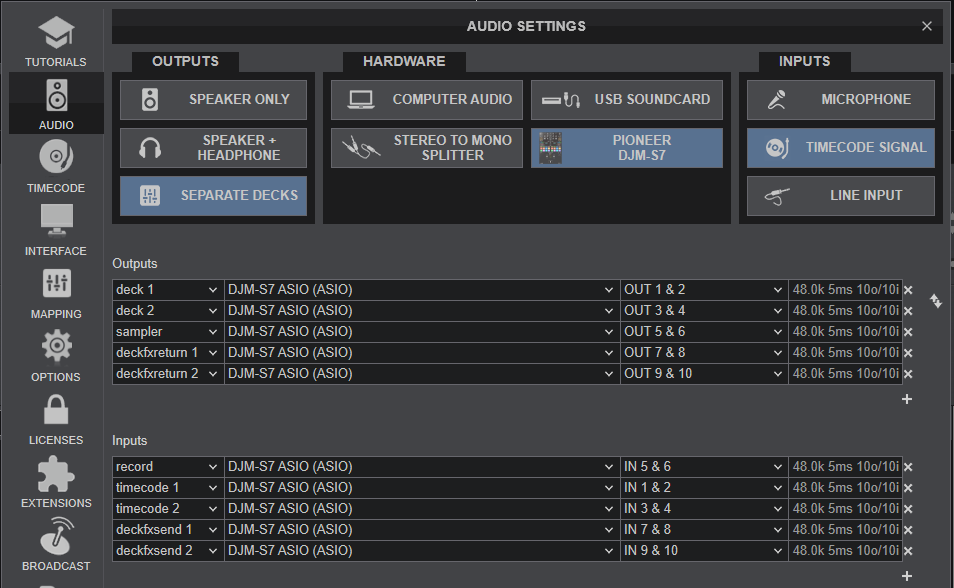
Click on the “DJM-S7” button and VirtualDJ will automatically create and apply the pre-defined audio configuration using the built-in audio interface of the Pioneer DJM-S7
Click to OK.
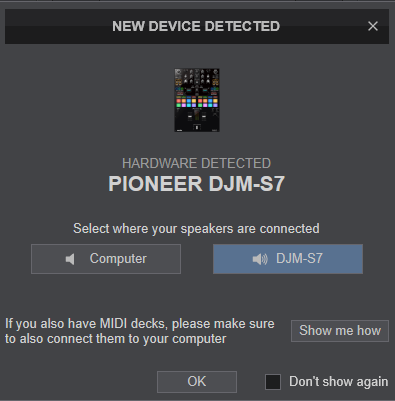
The unit is now ready to operate with VirtualDJ.
MIDI Operation
The unit should be visible in the CONTROLLERS tab of Config and the “factory default” available/selected from the Mappings drop-down list.
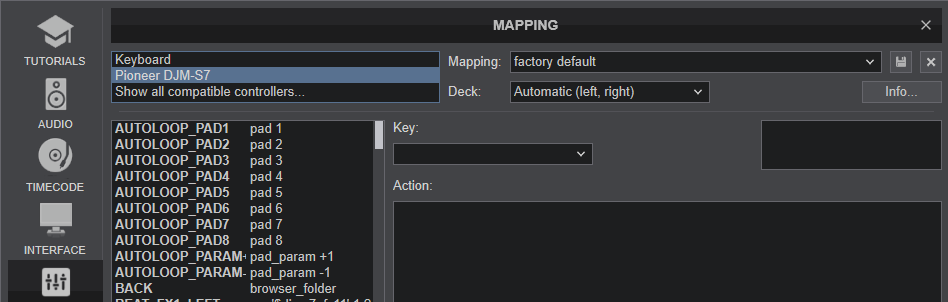
The factory default Mapping offers the functions described in this Manual, however those can be adjusted to your needs via VDJ Script actions.
Find more details at
https://virtualdj.com/wiki/VDJ8script.html
AUDIO Setup
The unit has a pre-defined Audio setup and a special button in the AUDIO tab of Config to provide that. Alternative setups can be applied in the same window. See Advanced Setup
For further software settings please refer to the User Guide of VirtualDJ.
https://virtualdj.com/manuals/virtualdj.html