


Beatpad 2
Pads
The 8 Performance Pads (23) offer 8 different modes, depending on the PAD MODE buttons (22).
Velocity
The PADS of the Beatpad2 offer Touch Velocity and After-Touch Velocity in all modes.
Set the PADS to HotCue mode and then press the same button while SHIFT is held.
If the Pads flash Green, the PADs are set to Velocity mode. If the Pads are momentary list red, the Pads are in Normal (non-velocity mode).
In the factory default mapping of the Beatpad2, the Velocity (how hard you push the Pad) is used only in the SAMPLER mode and controls the Volume of each Sample.
HotCues mode
Press the HOTCUE mode button to set the PADs to HotCues mode. On the default VirtualDJ GUI, the Pads section will now indicate the default HotCues page
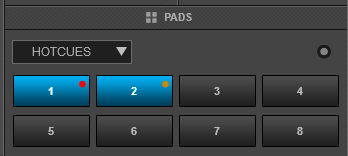

In this mode, each one of the 8 pads assigns a Hot Cue Point (1 to 8) or returns the track to that Hot Cue Point.
When a Hot Cue Button is unlit, you can assign a Hot Cue Point by pressing it at the desired point in your track. Once it is assigned, the Hot Cue Button will get the color of the relative HotCue point.
Hold SHIFT and then press a pad to delete its assigned Hot Cue Point.
Sampler mode
While the HOTCUE mode is selected, press the same mode button again to set the PADs to Sampler mode. The LED of the HOTCUE button will blink as an indication of this mode selection and the special BP Sampler page will be selected in the Pads section of the default VirtualDJ GUI.
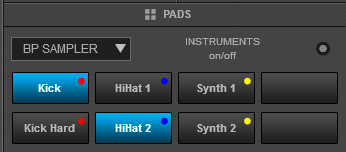
Each one of the 8 Pads triggers a sample from the selected Sampler Bank of VirtualDJ. If a bank has less than 9 samples, both sides of the Beatpad2 will control the same samples. If a bank has more than 8 samples, the left side of the Beatpad2 will control samples 1 to 8 and the right side samples 9 to 16.
The LEDs of the Pads will tend to get the assigned color of each sample, as the Beatpad2 is capable of offering 64 individual colors.
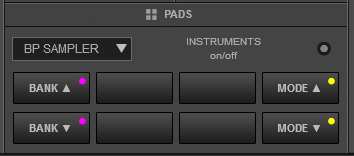
Hold SHIFT down and then use Pads 1 or 5 to select the previous or next available Sampler Bank.
Hold SHIFT down and then use Pads 4 or 8 to select the next or previous sampler trigger mode (On/off, Hold, Stutter and Unmute)
Auto Loop mode
Press the AUTOLOOP mode button to set the PADs to Auto Loop mode.On the default VirtualDJ GUI, the Pads section will now indicate the default Loop page
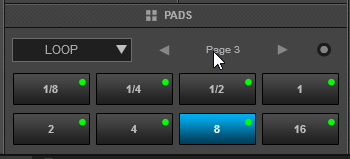
In this mode, each one of the pads triggers a seamless loop of a different size in beats (from 1/32 to 128 beats), depending on the selected Loop page (bank). The page can be selected via the VirtualDJ GUI, using the Parameter arrow buttons..
Once a Loop is triggered, choose a different size to continue the loop or press again the lit pad to exit the Loop.
Bounce Loop (Roll) mode
While the AUTOLOOP mode is selected, press the same mode button again to set the PADs to Loop Roll mode. The LED of the AUTOLOOP button will blink as an indication and the default Loop Roll page will be automatically selected in the Pads section of the VirtualDJ GUI
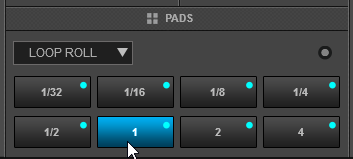
Press (and keep down) any of the 8 pads to trigger a momentary Loop Roll of a different size in beats (from 1/32 to 4 beats) as per the image.
Once the PAD is released the track will continue to play from the position it would have been if the Loop Roll was never triggered.
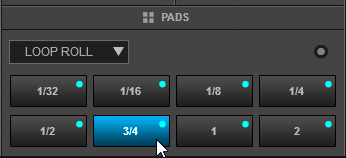
Hold SHIFT down to get a different size of Loop Rolls (3/4, 1 and 2 beats) for the last 3 low pads.
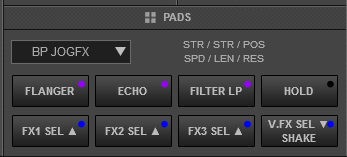
TOUCH FX mode
Press the TOUCH FX mode button to set the PADs to Effects mode. The special BP TouchFX page will be then automatically selected in the Pads section of the VirtualDJ GUI
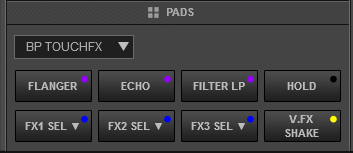
In this mode, the first 3 Pads of the top row (1-2-3) trigger the selected Effect of Slots 1 to 3.
The 4th upper Pad toggles between normal and Hold mode. When Hold mode is enabled, the Effects will be triggered momentary (while the Pads 1-3 are held down). When disabled, the Effects will toggle between on/off.
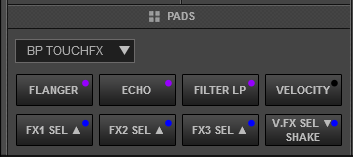
Hold SHIFT down and use Pad 4 to toggle software Velocity. If enabled the Pads 1-3 will also control the Effect Parameters, depending on the pressure applied to the Pads. Note that the Hardware Velocity needs to be turned on as well. This is an extra option, to allow using velocity to other modes (e.g. Sampler), but keep the FX Velocity off.
Use the first 3 Pads of the 2nd row (5-6-7) to select the next or the previous Effect (if SHIFT is pressed) for the 3 Effect Slots
The 4th Pad of the low row triggers the selected Video Effect on Master . Hold SHIFT and then use the same Pad (8) to select the next available Video Effect on Master.
JOG FX mode
While the Touch FX mode mode is selected, press the same mode button again to set the PADs to Jog FX mode. The LED of the TOUCH FX button will blink as an indication and the special BP JogFX page will be automatically selected in the Pads section of the VirtualDJ GUI
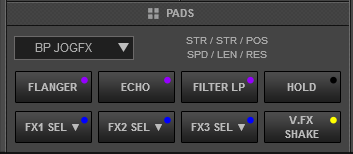
In this mode the 8 Pads offer exactly the same Effects functionality. The only difference is that the Jogwheel controls the 1st and the 2nd (if SHIFT is pressed) Parameter of all 3 the selected Effects on Slots 1 to 3 simultaneously, and the Leds around the Jog will indicate the amount of the applied Parameter. The Velocity is not used in this mode.
Slicer mode
Press the SLICER mode button to set the PADs to Slicer mode. The special BP Slicer page will be then automatically selected in the Pads section of VirtualDJ GUI
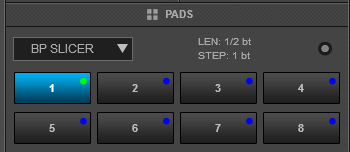
The 8 Pads represent 8 sequential beats/"Slices" in the Beat Grid. The playing Slice is represented by the currently green lit pad. The green light will "move through the pads" as it progresses through each 8-Slice phrase. Press a pad to repeat that Slice (hold it down if you want to keep looping it).
Once the Pad is released the track will continue to play from the position it would have been if the pad was never pressed.
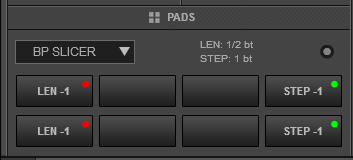
Hold SHIFT down and then use Pads 1 and 5 to increase/decrease the length of the applied loop on the Slice and Pads 4 and 8 to increase/decrease the step of the slices.
Slicer Hold mode
While the Slicer mode is selected, press the same SLICER mode button again to set the PADs to Slicer Hold mode (led will blink). The special BP Slicerloop pad page will be then automatically selected in the Pads section of the VirtualDJ GUI
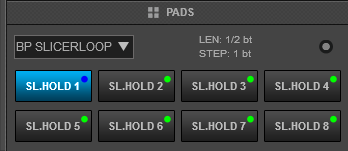

In this mode the pads offer the same functionality as in the Slicer mode, but in this case, the Slice is memorized on first press as the track continues to play. (HOLD mode).
The playing Slice is represented by the currently blue lit pad.