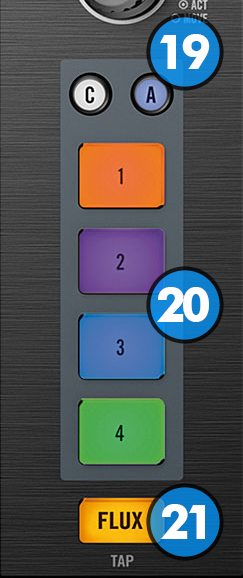
HOTCUE BANK SELECT: Press these buttons to select the active hotcue bank for each deck. Buttons A & B select bank 1 for decks 1 & 2 respectively while buttons C & D select bank 2. When bank 1 is selected the hotcue buttons (20) act against hotcues 1-4, while when bank 2 is selected they act against hotcues 5-8.
HOTCUES: Each one of the 4 buttons assigns a Hot Cue Point or jumps the track to that Hot Cue Point (if already assigned). When a Hot Cue Button is unlit you can assign a Hot Cue Point by pressing it at the desired point in your track. Once it is assigned, the Hot Cue Button will light on. The last used Hot Cue Point will light on white color, while the rest stored Hot Cue Points will light on green color. Hold down SHIFT (13) and then press a button to delete its assigned Hot Cue Point. While SHIFT is held the stored Hot Cue Points will light on red color.
SLIP: Enables Slip Mode. Several software functions (such as HotCues and Loops) will apply temporarily on the track, and the track will return to the position it would have been if those functions were not triggered. Please note that Slip Mode does not work with Timecode. Hold down SHIFT (13) and then tap this button a few times to manually set a new BPM for the track.


 Hotcues.png)