DDJ-RZX
Pads Performanti
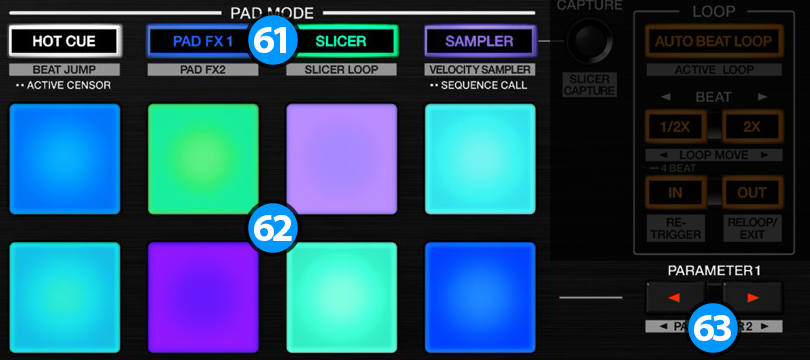
- PAD MODE. Press any of the 4 available Pad mode buttons to set the Pads to Hotcues, Pad FX1, Slicer and Sampler mode.
Hold SHIFT and then press any of the 4 available Pad mode buttons to set the Pads to Beatjump, Pad FX2, Beat Loop and Velocity Sampler mode. - PERFORMANCE PADS. The 8 Pads offer different functionality depending on the selected mode.
- PARAMETERS. These buttons control the Parameters of the selected Pad mode.
The Parameters of each mode can be adjusted from the VirtualDJ GUI (Pads section)
Read further details about Pads in the VirtualDJ 8 manual
HOT CUE
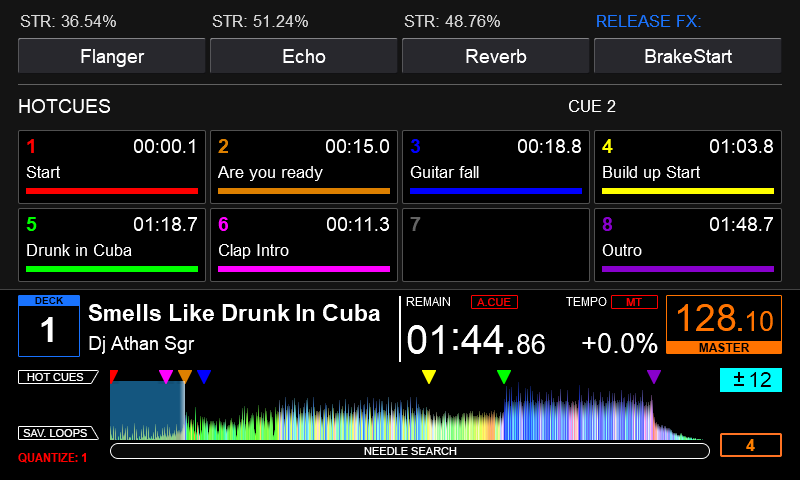
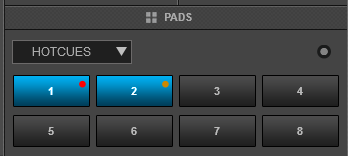
Each one of the 8 pad assigns a Hot Cue Point (1 to 8) or jumps the track to that Hot Cue Point (if assigned).
When a Hot Cue Button is unlit, you can assign a Hot Cue Point by pressing it at the desired point in your track. Once it is assigned, the Hot Cue Button will light on.
Hold SHIFT and then press a pad to delete its assigned Hot Cue Point.
PAD FX1
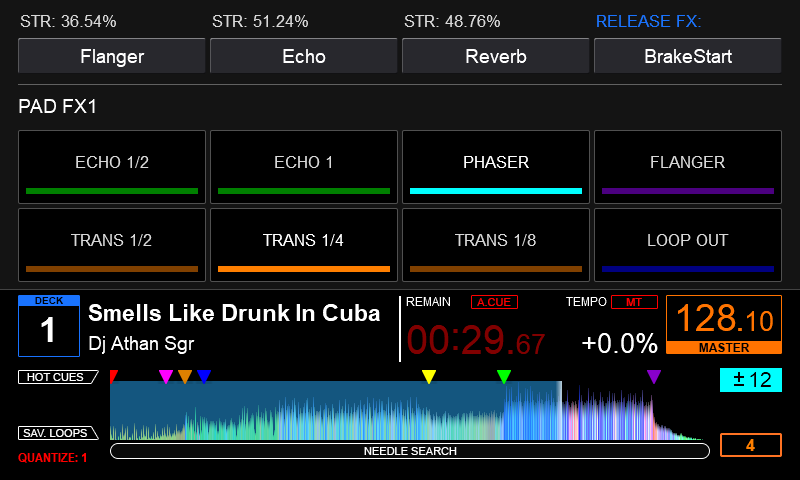
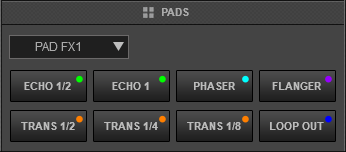
Each one of the 8 pad triggers a pre-defined Effect as per the image on the side.
Pads 1-2 : Trigger the Echo Effect of 1/2 and 1 beats size respectively.
Pad 3: Triggers the Phaser Effect at 8 beats Speed.
Pad 4: Triggers the Flanger Effect at 8 beats Speed.
Pads 5-7: Trigger the Cut Effect of 1/2, 1/4 and 1/8 beats size respectively.
Pad 8: Triggers the Loop Out effect.
SLICER
The 8 pads represent eight sequential beats—"Slices"—in the Beat Grid. The currently playing Slice is represented by the currently green lit pad. The light will move through the pads as it progresses through each eight-Slice phrase. Press a pad to repeat that Slice (hold it down if you want to keep looping it).
Once the Pad is released the track will continue to play from the position it would have been if the pad was never pressed.
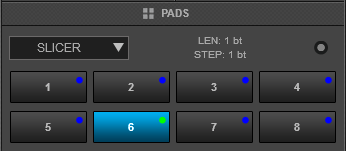
Hold SHIFT and then use the Pads to repeat the memorized Slices (the Slices played/repeated last time)
Use the PARAMETER buttons to adjust the length of the Loop applied to the slice. or adjust the step of the Slices
SAMPLER
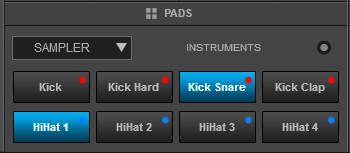
Each one of the 8 pads triggers a sample from the selected Sampler Bank of VirtualDJ. If a bank has less than 9 samples, both sides of the DDJ-RZX will control the same samples. If a bank has more than 8 samples, the left side of the DDJ-RZX will control samples 1 to 8 and the right side samples 9 to 16.
Press the pads to trigger a sample. Depending on the selected trigger Pad mode, use SHIFT and the same pads to stop the sample.
Use the PARAMETER buttons to select the Sampler Bank (previous/next).
BEAT JUMP
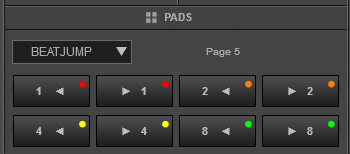
In this mode, each one of the Pads will jump the track backwards/forward by the amount of beats depending on the selected page/bank (from 1/8 beats to 32 bars)
Use the PARAMETERS buttons to select the previous/next page with the desired Beats sizes
PAD FX2
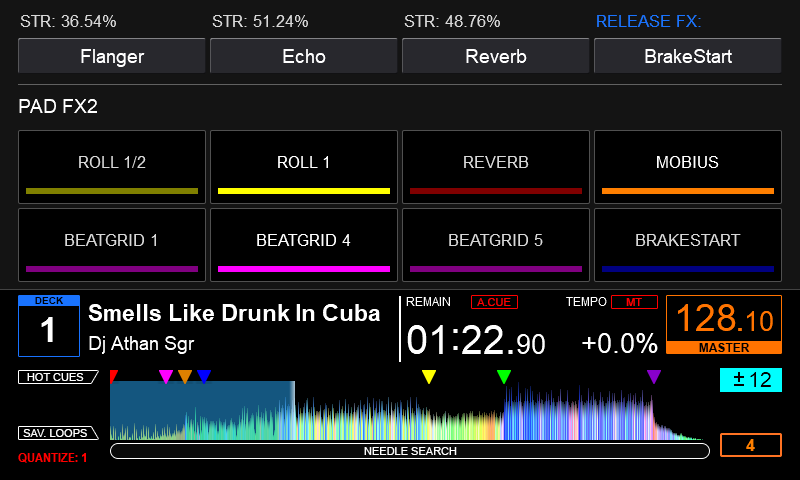
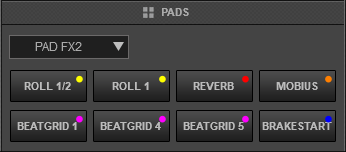
Each one of the 8 pad triggers a pre-defined Effect as per the image on the side.
Pads 1-2 : Trigger the Loop Roll Effect of 1/2 and 1 beats size respectively.
Pad 3: Triggers the Reverb Effect.
Pad 4: Triggers the Mobius Effect.
Pads 5-7: Trigger the 1st, 4th and 5th bank of Beat Grid Effect respectively.
Pad 8: Triggers the BrakeStart Effect.
LOOP
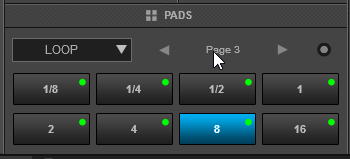
Press one of the pads to trigger an Auto Loop of a different size in beats, depending on the selected page. There are 6 different pages available with sizes starting from 1/32 up to 128 beats.
Use the PARAMETER buttons to select the previous/next page with the desired Loop sizes
Hold SHIFT and then use the PARAMETER buttons to change the behavior of the Loop pads, by selecting the On/Off (toggle), Hold (momentary – while pad is pressed) or the Roll mode (track will resume to the position it would have been once the pad is released)
VELOCITY SAMPLER
Each one of the 8 pads triggers a sample from the selected Sampler Bank of VirtualDJ. If a bank has less than 9 samples, both sides of the DDJ-RZX will control the same samples. If a bank has more than 8 samples, the left side of the DDJ-RZX will control samples 1 to 8 and the right side samples 9 to 16.
Press the pads to trigger a sample. Depending on the pressure you apply on the pads the volume of the corresponding sample will adjust accordingly.
Use the PARAMETER buttons to select the Sampler Bank (previous/next).

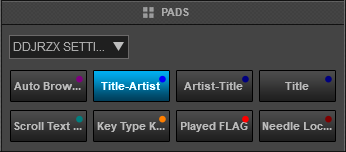
DDJRZX SETTINGS
Pioneer DDJ-RZX also offers a special pad page that's available only when the unit is connected and it allows you to adjust a few settings regarding it's screens operation.
Hold down HOT CUE mode button for more than 1 second to set the PADs to DDJRZX SETTINGS mode and automatically load the corresponding page in VirtualDJ GUI.
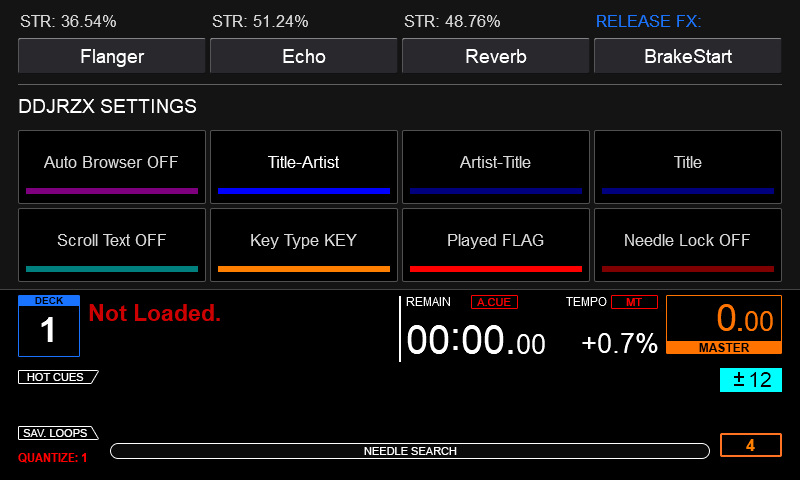
Each one of the 8 pad adjusts a setting as per the image on the side.
- Pad 1: Auto Browser (On/Off - Default is Off)
When enabled, the screen on the center of DDJ-RZX will show a browser when the browser is active. - Pads 2-4: Title - Artist, Artist - Title, Title (Default is Title - Artist)
Press one of these pads to set the desired format for the information displayed on the browser of DDJ-RZX central screen. - Pad 5: Scroll Text (On/Off - Default is Off)
When enabled the texts on all screens will scroll instead of being truncated when they don't fit on their designated space. - Pad 6: Key Type (Key/Camelot - Default is Key)
Select whether you want to see the key of the track as a musical key (e.g A) or as numeric -Camelot System- (e.g. 11B) - Pad 7: Track Color (Played Flag /Track Colors - Default is Played Flag)
Select the color of the files you wish to see on the browser of DDJ-RZX central screen. When set to Played Flag, tracks will appear with white text color and change to red if they have being played. When set to Track Colors the songs on DDJ-RZX screen browser will appear with their assigned color. - Pad 8: Needle Lock (On/Off - Default is Off)
When enabled, using the progress waveform on DDJ-RZX screens to seek through the track is prohibited if the track is audible.
PADS ON DDJ-RZX SCREENS
Depending on the selected view of Pioneer DDJ-RZX screens, all the pad pages will also show on deck screens.
Here are some examples of how some pad pages looks like on the DDJ-RZX deck screens:
