DDJ-REV7
Setup Avanzato
The Pioneer DDJ-REV7 offers 2 built-in audio interfaces with 2 stereo Outputs and 2 stereo Inputs each. The Mixer Inputs are determined by the Input Select switchers at the top panel of the unit.
The USB Output Channels can be set to different modes via the Pioneer DDJ-REV7 Setting Utility application.
How to open the Pioneer DDJ-REV7 Setting Utility:
For Windows computer:
Click on the ASIO button you will find in the AUDIO tab of VirtualDJ Settings or ...
Click [START] menu [All Programs] [Pioneer] [Pioneer DDJ-REV7 Setting Utility]
For Mac OSX computer:
Click [MACINTOSH HD] icon [Applications] [Pioneer] [Pioneer DDJ-REV7 Setting Utility]
Timecode (DVS)
VirtualDJ is offering DVS (Digital Vinyl System) support for the Pioneer DDJ-REV7. A Pro Infinity license is required. https://virtualdj.com/buy/
Up to 2 Timecode Inputs are available to control any software decks via Timecode CDs or Vinyls.
Both Mixer Channels CH1 and CH2 can accept PHONO (for Timecode Vinyls) or CD/LINE (for Timecode CDs)
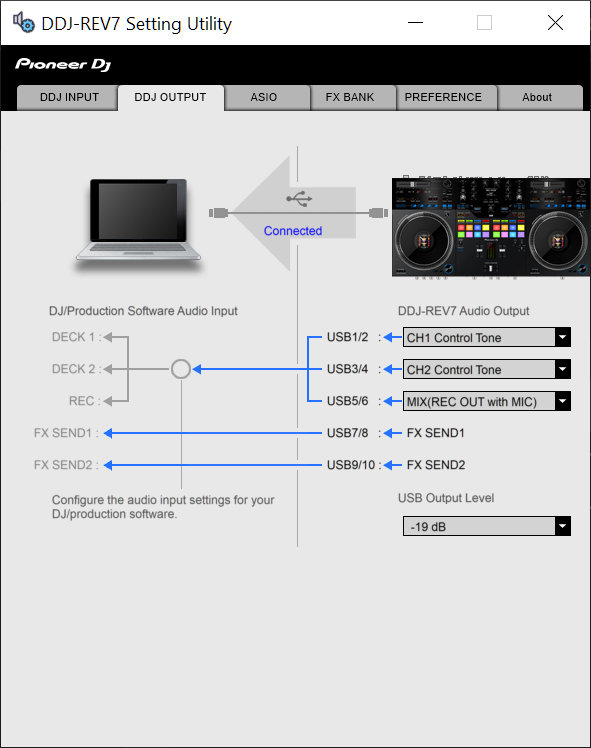
Open the Pioneer DDJ-REV7 Setting Utility and make sure that the USB 1/2 and 3/4 Channel Outputs are set to the appropriate mode (CH1 and CH2 Control tone)
Close the Settings Utility
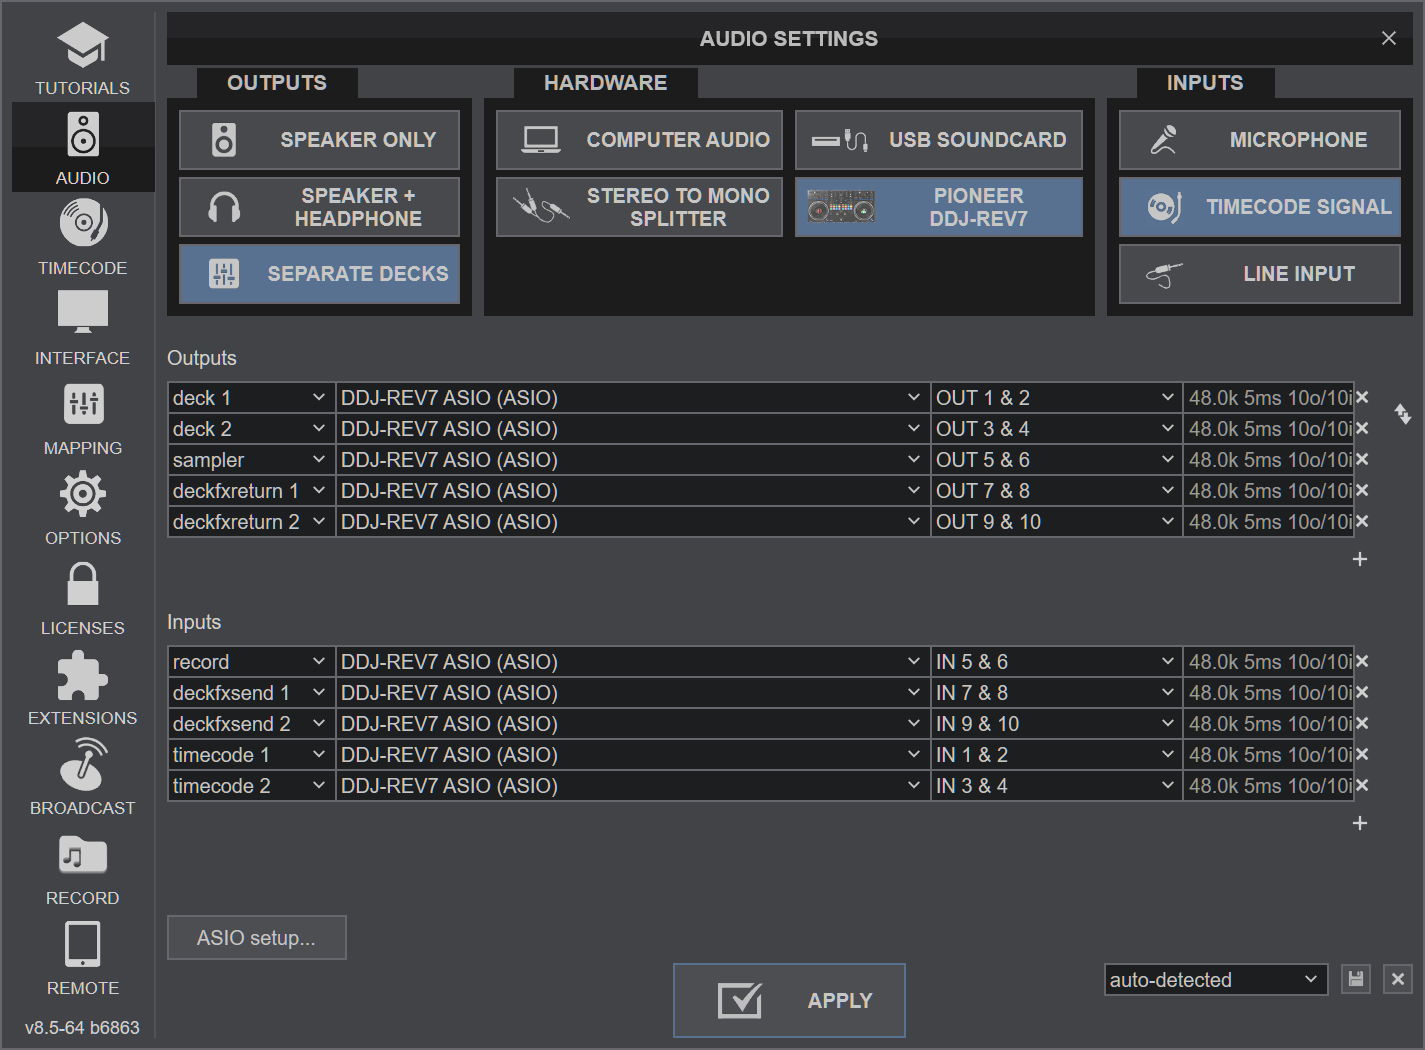
Open VirtualDJ Config and click on AUDIO tab.
Then click the "TIMECODE SIGNAL" button, and finally the APPLY button.
Your Sound Setup should look as in the following picture:
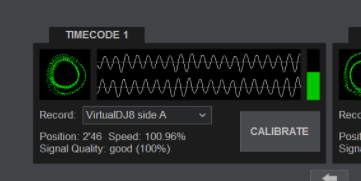
Press PLAY on your timecode CD and/or Vinyl device and VirtualDJ will automatically detect your Timecode type and make the appropriate adjustments for best performance.
Open the TIMECODE tab of the VirtualDJ Settings and choose the CALIBRATE button if for any reason the signal is not detected (possibly due to reversed phase connections).
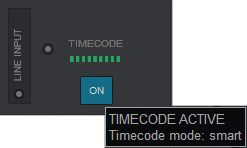
Click on the ON buttons from the TIMECODE panels of the Default Skin to enable the Timecode control to any software deck.
Recording
No adjustment is required in order to record (or/and broadcast) your mix with VirtualDJ. A record input is already pre-configured in the Audio Setup.. Just make sure the USB 5,6 Mixer Output from the DDJ-REV7 Utilities panel is set to MIX(REC OUT).
Open the MASTER center panel of the VirtualDJ GUI and click to the REC button (or BCAST for broadcasting) to record your mix.
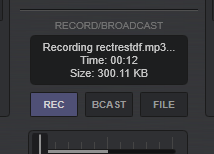
The recorded output includes any source routed to the Mixer, including analogue media sources connected to the CH1 or CH2 Inputs when the top switchers are set to the relative position.
RECORDING LEVEL
By default when you are recording with a dedicated Record input, VirtualDJ has no control over the sound levels of the recordings. The Pioneer DDJ-REV7 Setting Utility offers some options over the sound level that it sends back to VirtualDJ for recording. The default value is -19db which provides enough headroom for your recordings so that they won't clip. You can change that value from Pioneer DDJ-REV7 Setting Utility according to your needs. Just select your desired value from the USB Output Level drop down menu.
Back to Back Mixing
The Pioneer DDJ-REV7 has two USB ports, allowing simultaneous connection of two computers. Each port is completely independent. It is possible to run VirtualDJ on one computer and any other 3rd-party DJ-software on the other, Mac or PC.
How to:
- Connect the 2nd computer to the unused USB port on the DDJ-REV7.
- Switch the Source Select switcher on the non-playing mixer channel to the USB source of the 2nd computer.
- Play a track on this deck and mix it when ready – you'll now have audio from both computers during the mix.
- Fade out the audio playing from the 1st computer to the audio playing from the 2nd one.
- When only audio from the 2nd computer is left in the mix, remove the first computer.
- Assign the Source select switcher for the remaining free mixer channel to the 2nd computer and keep mixing.
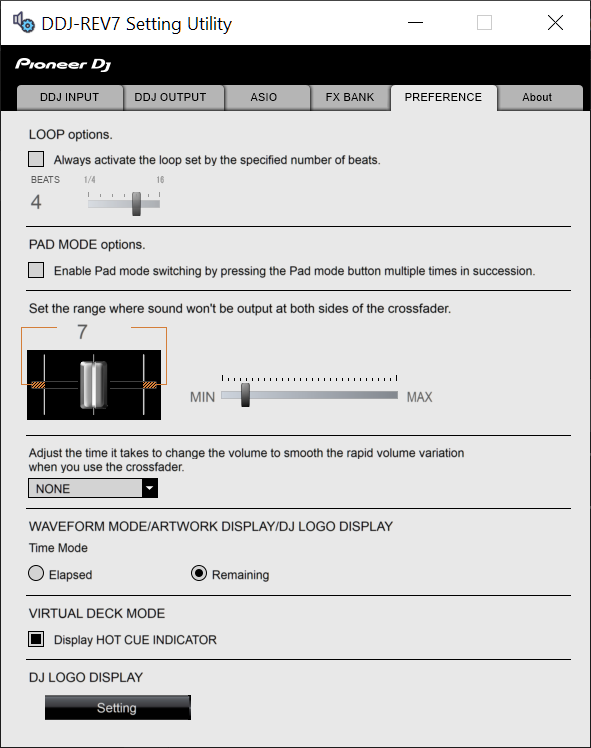
PREFERENCES
The Pioneer DJM-REV7 Setting Utility application offers a few advanced options to choose from, such as the behavior of the LOOP buttons, the adjustment for the Crossfader behavior and how the Pad mode buttons will be selected.
Make your adjustments via the PREFERENCES tab of the Pioneer DDJ-REV7 Utilities
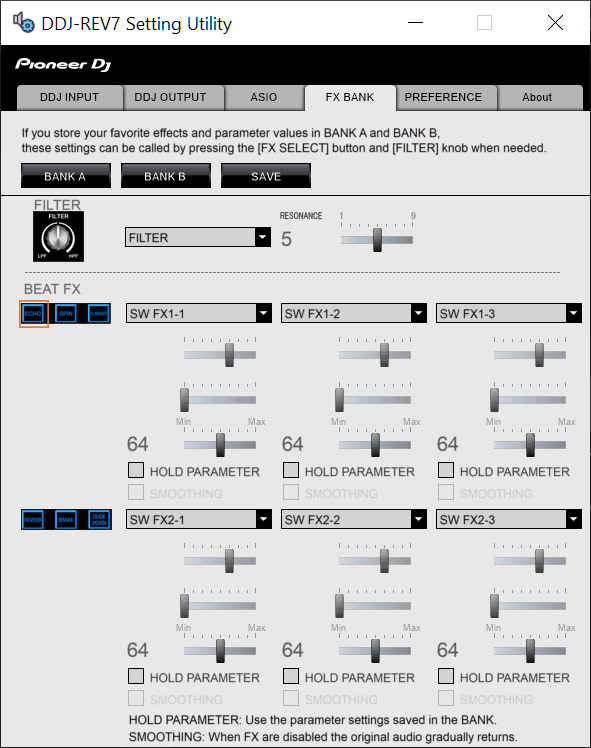
You can also choose the Effects of the 2 available FX Banks via the FX BANK tab of the Pioneer DDJ-REV7 Utilities.
Note: Currently VirtualDJ is not supporting this feature for the Software Effects. Regardless of the selected FX Bank (A or B), the same VirtualDJ Effects will be used.